It is easy to install a shower enclosure. First, attach the frame brackets to the wall. The fixed glass panels are then attached to the frame's top and bottom. After the frame has been moved onto the tray, the sliding doors can be assembled and hung. Finally, handles and seals will be fitted. The exterior is sealed, and the frame is fixed to the brackets.
Installing bathroom features like a shower enclosure requires that the shower tray be fitted first. Then any tiling can be done.
This is the preferred method for most bathroom fittings. It also works well with other fixtures such as baths, basins, toilets, etc. It doesn't require cutting tiles to fit around the odd-shaped items.
This DIY guide will show you how to install a 900x900 equal quadrant (both sides equal in size) onto a previously installed shower tray.
The shower tray must be correctly installed. Use a spirit level to ensure the tray is level. It will cause problems throughout the entire installation. (For more information, see our project on the shower tray here).
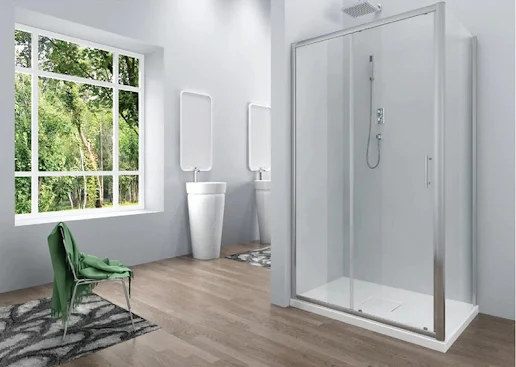
The quadrant shower enclosure is the best choice as it can fit into the corner of a bathroom and yet, because of its curving shape, provide the most space within the enclosure. You can find more information about other shower enclosures in our project.
How to Install A Shower Enclosure
Step 1: Unpack the Shower Enclosure kit and check that all parts are present
Before assembling anything, make sure that all parts of the chosen shower enclosure are in the kit.
It's not uncommon for a "flat-pack" furniture item or fixture to be halfway through assembly only to discover that one of the vital parts is missing.
There should be an enclosure kit that lists all fittings. Please go through it all and make sure they are there.
Contact the company where you bought it and let them know.
Step 2: Level, Mark, and Fix Shower Enclosure Brackets
Vertical upright brackets hold the enclosure securely in place above the tray. The brackets are attached to the wall with screws, and the shower enclosure frame is then screwed to each bracket.
The shower enclosure fixing brackets should be placed around 5mm from the front edge of the tray. Place each bracket and mark each fixing hole with a pen.
The type of surface that you are fixing brackets will determine the method used.
Tiled Bricks/Blocks: Use an 8mm tile drill bit to drill through tiles, and then use a 6mm masonry bit to drill holes in bricks/blocks. Push wall plug through the tile and into the hole. Screw into the bracket.
Play Board: Use an 8mm tile drill bit to drill through tiles. Stop when you reach the plyboard. Make a pilot hole in the ply, then screw it into the bracket using appropriate wood screws.
Plaster/Cement board: Drill 10mm through the tile using tile drill bits. Next, drill a pilot hole through the board of 3mm. Install a Redidrive (metal-self-drilling fixing) through the tile hole. Fix the bracket to the Redidrive fixing by screwing through the bracket
Shower panels: Drill a pilot hole through the panel using the above fixing advice. If necessary, enlarge the hole. Redidrives require a hole of approximately 10mm. Brick, block, and other materials will need around 6mm. Screw through brackets to fix wall plug, Redidrive, or brick.
This is a simple example of how to fix a plyboard that has been covered with shower panels. When renovating your bathroom, think about how fixtures and fittings are installed. Our advice is to make it as simple as possible.
Before the brackets were attached, a silicone bead was applied along the entire length of the bracket's rear.
Step 3 - Assemble Shower Enclosure Frame

Assembling the shower enclosure frame should be done one side at a time. It is easier to have help. Ask your assistant for help. Hold one of the fixed glass panels vertically and then slide on one of the sealing strips with the shower enclosure kit.
Next, slide the quadrant frame base onto the bottom of the glass panel. Then, with the provided fixing screws, screw the frame section at the screen's base into the quadrant frame. There should be two fixing points.
Holding the first panel with your assistant, place the second panel next to the base quadrant frame. Your assistant can help you support it.
Place the plastic sealing strip on the base, slide the panel onto it and screw it in place just like the first.
Once the quadrant base is fixed, apply a sealing strip to each glass panel. Next, place the top section from the quadrant frame on each panel. Screw it up using the fixings on either side.
Note - The assembly process for your chosen shower enclosure might differ slightly. Always refer to the manufacturer's instructions for complete information.
Step 4 - Move Shower Enclosure Frame into Position
You will need help to position the shower enclosure. You will need to manoeuvre the enclosure carefully around objects and through any openings, taking care not to damage it.
Once you have found the right area, move the item onto the tray. Next, slide the ends of the upright panels into the brackets.
Visually inspect the bottom quadrant frame to ensure it is level and flat on the shower tray. There shouldn't be any gaps.
Step 5: Prepare Sliding Shower Doors & Shower Door Rollers
All the shower door rollers should be removed. The spring-loaded, movable rollers can be fixed to the bottom of the sliding doors. While the fixed ones are attached to the top of the sliding doors, they can be removed at any time.
To hold the glass door upright, use a second pair.
First, fix the top rollers. The roller section is located on the outside concave of your door. Place each roller on the fixing hole at the front of your glass door. Cover the hole with the cover and screw the fixing screw through to the back. Do not over-tighten the rollers. Instead, pull it in one last time.
You can also turn the door upside-down and attach the bottom rollers to the door using the same method.
Do the same for the second after you have attached all four rollers to the first door.
Use a screwdriver that can be used by your hand and not a drill/driver.
Step 6: Hang sliding shower doors on to frame
After the rollers are fixed, the doors can be attached to the frame. One of the sliding doors should be moved into the shower enclosure.
Hold the rollers in your hands with both your hands on the door. The rollers should fall straight in. Make sure that both sets of rollers are fully inverted into the recess.
Move down to the bottom of the door once the top section has been securely hung in its place.
Use a little pressure on the base of your door to push the rollers into the recess at the bottom of the frame. You will need to help, and both hands are needed for the next task. Use your foot if no one is nearby.
Push down on each roller's top to engage the bottom sliding wheels in the frame. They drop as spring-loaded, allowing them to fall into the frame recess. The spring action pulls them up again to hold the door in place while allowing it to slide smoothly.
For the second door, repeat this process.
Make sure that the gap between sliding doors is even. The top brackets of the sliding rollers can be adjusted if necessary (refer to manufacturer instructions). Adjust until the gap is correct.
7 - Install handles on sliding doors
First, remove the fixing brackets from the backs of the handles for sliding shower doors. Next, position the handle on the outside edge of the door. Then screw a screw into each fixing bracket.
Once you have secured one bracket, repeat the process for the second. Any item that is needed square it up.
Depending on its make and model, you can clip the cover to the shower enclosure's inner bracket.
Step 8: Fit Shower Enclosure Doors Seals
Shower enclosure doors seal and stop water from escaping outside the enclosure. There should be six strips total. Two of them are attached to the doors at their edges. One is on the back edge of each door, and one is on each panel that meets the end of each sliding glass door. Push the strips on to fit.
Some sliding doors have magnets running along the edges of the sealing strips. This helps keep the door closed when the shower is not in use. This will allow you to identify the door seals.
To help seal your shower enclosure properly, make sure the sealing strips are angled to meet at the bottom.
Clip sections should be used for fixing panels and the back edge of the door. Then, a 90deg strip should be added. This section fills in the gap between the fixed panel and the sliding door.
The clip at the end of the door closes completely. It connects to the clip on the fixed panels and seals the gap.
Step 9: Fixed Shower Frame to Brackets
Once the shower frame is in place and the doors have closed as expected, it's time to attach the frame to the brackets.
You should find between 3 and 6 holes on the inside of each upright bracket. These holes run from top to bottom. Use a 2-3mm drill bit to drill the top hole. Locate the right screw in your kit and insert it into the cup. Cover it with a cover, then screw it up.
After the first screw has been screwed into place, drill out the other fixing points and screw them up. These steps can be repeated for the bracket and enclosure sides.
Step 10: Fit sliding door roller covers and frame caps
Cover the area where each of the sliding door roller brackets is now. This covers the fixings to keep water from rusting over time.
Push the covers down on top of each bracket.
End caps may also be included in your kit. These are meant to be attached over the frame's top edges. These should not be removed. These caps stop water from getting down into the frame.
Step 11: Seal the Shower Enclosure with Sealant
We are often asked how to seal a shower enclosure. Also, where can I get a silicone shower enclosure? It is essential to seal a shower enclosure so that water doesn't escape from the frame.
Shower enclosures are not sealed inside. This is so that water can not get into the frame and run back to the tray.
After the silicone has been applied with a sealant gun, wet your finger. Use it to push the sealant into the joints and remove any excess. After filling all joints, allow them to dry for at least 24 hours before using it.
A clear silicone sealant is used for a stainless steel frame and a white tray. However, a white colour sealant can be used for a white tray and frame.
This guide is for fitting a quadrant-shaped shower enclosure. However, there are many other shower enclosures available, including frameless and square enclosures, quadrant, quadrant, rectangle, and offset enclosures.
It is very easy to fit any of these. The process for fitting any of these is pretty much the same.
Every manufacturer is likely to have a slightly different design or construction method for the same shower enclosure. It's worth taking the time to read the instructions that come with your kit.
No comments:
Post a Comment
Note: only a member of this blog may post a comment.